Purpose of this Guide
Capturing a Mission
Camera Settings
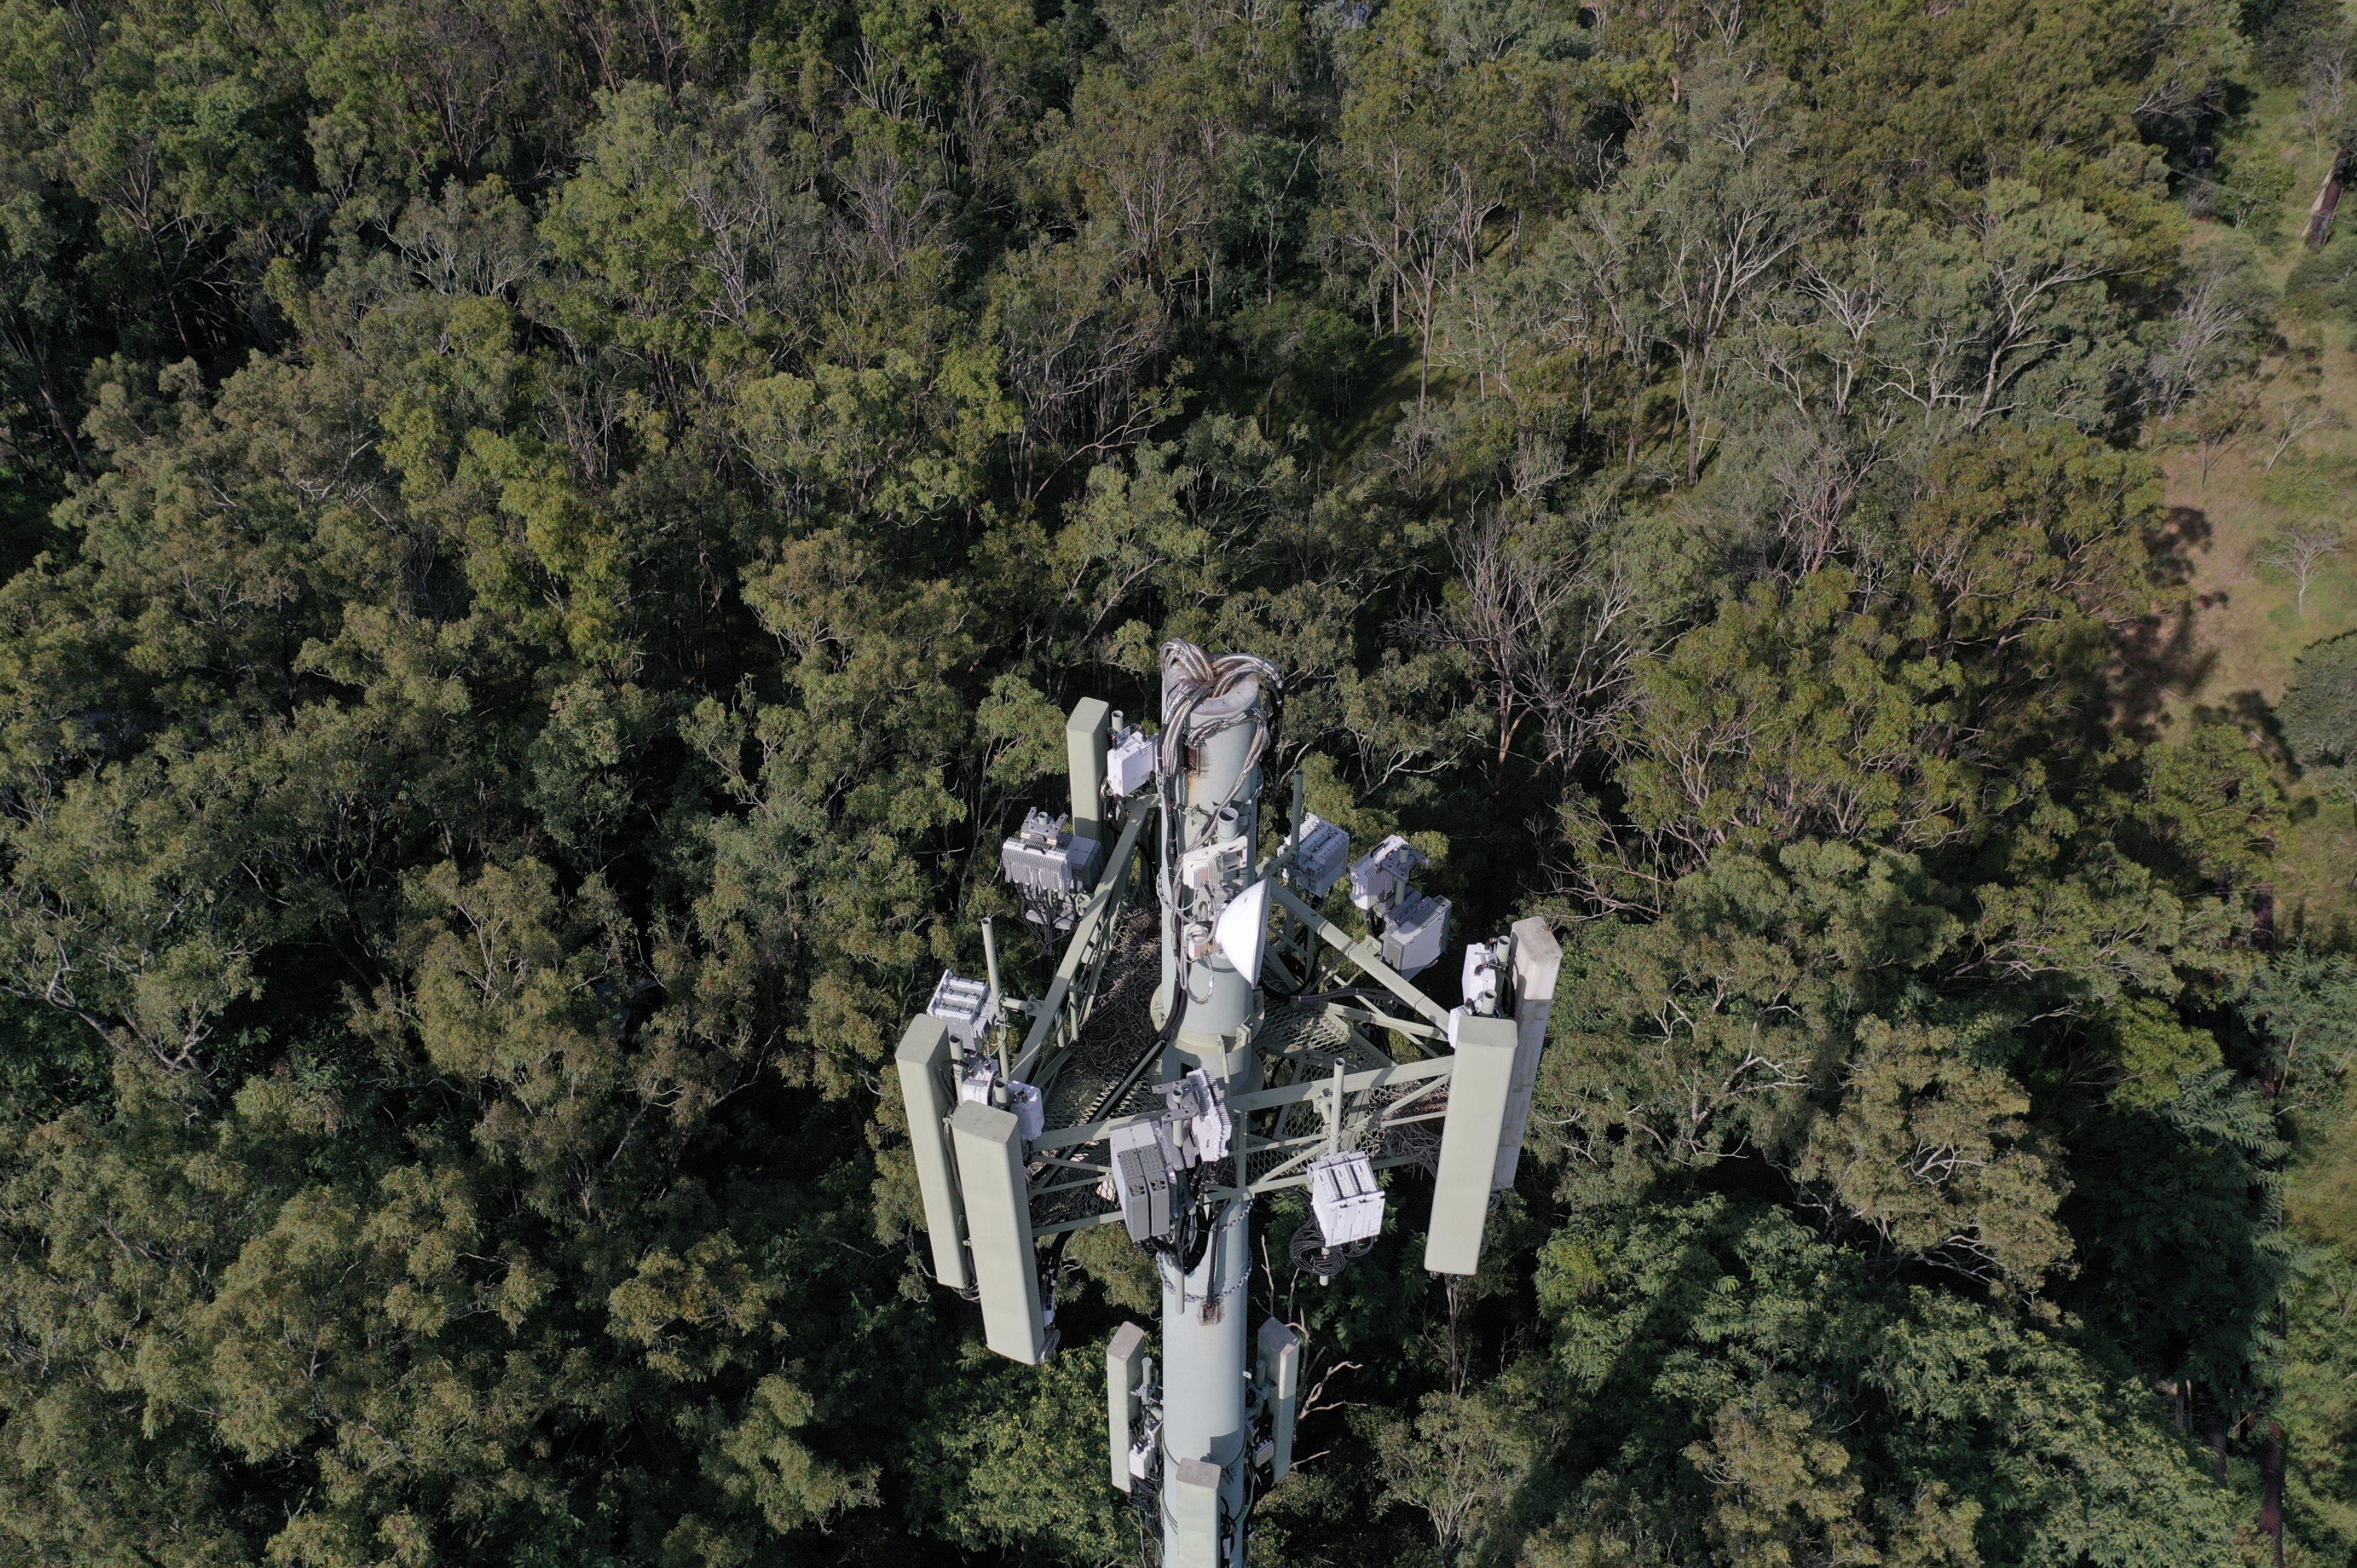
Tower Capture
Overview Orbit
Tower Scan
Antenna Scan
Optional Mission Components
Panorama
Orthomosaic
Using Ground Control Points
Purpose of this Guide
SiteSee specialises in high-accuracy 3D modelling of vertical structures such as cell towers. For best results, we strongly recommend that our customers use Scanlink to capture cell towers. It is our preferred capture system, and we offer an easy-to-follow training program that enables new pilots to quickly become proficient at using Scanlink.
This guide was written for customers who already are invested in another capture solution and would like to use it instead of Scanlink or who are using drones that are not supported by Scanlink. Note that we do not provide training for non-Scanlink capture methods. If you would like to use your own capture system, please submit your business case. If we accept your proposal, we will let you capture and upload two free trial captures. If these trials meet the specifications outlined in this guide, you will be certified to capture commercially using your own capture system with our platform.
Please note that this guide does not cover basic drone operation skills. It assumes that you
- know how to operate and fly your drone;
- have extensive experience using your capture system;
- have the necessary skills to safely perform all operations described in this guide;
- are familiar with the drone-specific regulations pertaining to the areas where they fly your missions and have all permissions required to fly; and
- know how to assess and mitigate the risks of operating your drone and do so for each mission in accordance with regulatory requirements.
Capturing a Mission
Preferable fly in these conditions:
- Fly in calm weather, with no strong wind or wind gusts. Windy weather can result in inaccurate flight paths and unsafe conditions.
- Ideally the sun should be near its zenith (i.e. avoid early mornings and late afternoons when the sun is low). During the winter months at high latitudes, it is better to fly on an overcast day with diffuse light. Flying when the sun is low results in harsh light that makes it difficult to set exposure and can cause lens flare.
- The weather should be stable. If the weather changes rapidly (sun shining, then disappearing behind clouds, then re-emerging, etc.), the resulting image set will be exposed unevenly. If you must fly in these conditions, make sure that you set exposure when the sun is out (i.e. not when it is behind clouds). Further information on how to set exposure is provided below.
Camera Settings
Incorrect camera settings are a frequent cause of capture issues and result in low-quality, often unusable image sets. So please make sure you strictly adhere to the instructions in this section. Note that if your drone/app combination does not support manual exposure, it is not suitable for SiteSee captures.
Basic settings:
- Reset all camera settings (aspect ratio, contrast, saturation, sharpness, etc.) to factory defaults.
- Set the file format to JPEG (i.e. not RAW, PNG, etc.).
- Use ISO 100 or, if not available, the next higher ISO setting.
- If the focus of your camera can be adjusted, select manual focus and set it to 15 m.
Use the following procedure to set exposure:
 Histogram Required
This procedure requires a histogram. If you are using a DJI drone, depending on the model, you can use the DJI Go app and turn on the histogram in the camera settings. For background information on what a histogram is and how to use it, please consult this page. If no app featuring a histogram is available for your drone, use your display to set exposure as bright as possible without blowing out the brightest parts of the tower (this method is far less accurate and should only be used as a last resort).
Especially on sunny days and when the sun is low, the side of the tower exposed to the sun is much brighter than its shady side. The procedure below uses the histogram to help you capture images that are neither too dark on the tower’s dark side nor too bright on its bright side.
- In your app, turn on the histogram.
- Place your drone on a white sheet of paper as shown below (to avoid reflections, do not use glossy or laminated paper) or a similar non-reflective, white surface. Ensure that the paper is flat on the ground and exposed to as much ambient light as possible. If the sun is shining, make sure the paper is in full sun and neither the drone nor anything else cast a shadow on it.
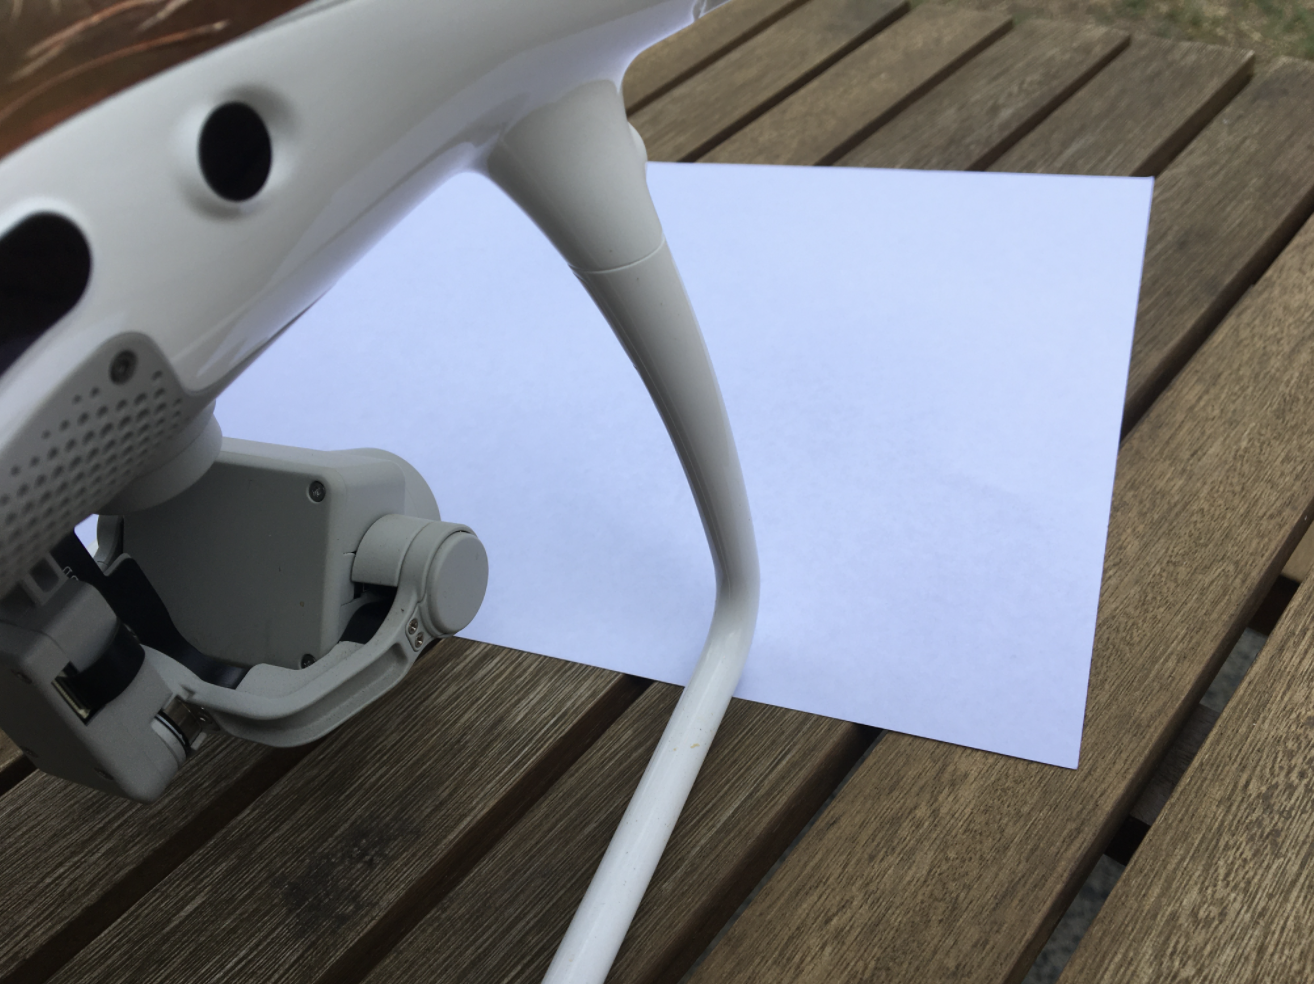
Adjust your drone's gimbal angle downward until the paper completely fills your app's display. - Select manual exposure and, if your drone's aperture can be adjusted, set it to F4.
- Adjust the Shutter speed until you see a single sharp peak approximately in the middle of the histogram. This peak represents the current exposure of the white paper.
- Slowly decrease the shutter speed in single steps and observe how this histogram peak moves to the right. Stop when the peak has nearly reached the right margin of the histogram and no longer moves when you further decrease the shutter speed (see screenshot below). Watch this video to better understand how to use the histogram:
Here some examples of correct and incorrect exposure settings:
Important: Stop reducing the shutter speed before the peak starts compressing (i.e. it no longer moves and starts to get thin like in the example above on the right). - Check the brightest parts of your tower (tower pole, antenna panels, dishes, etc.). If they are significantly darker than your sheet of paper (e.g. painted grey or green), reduce the shutter speed by -0.5 EV (e.g. from 1/2000 second to 1/1500 second).
Your camera is now set correctly, and your are ready to capture.
Tower Capture
Only set manual exposure once prior to starting the Tower Capture as instructed in the previous section. Use the same fixed settings for all components (i.e. Overview Orbit, Tower Scan, Antenna Scan), that is, do not change either ISO, aperture or shutter speed while the mission is in progress - even if the weather changes and the sun disappears behind clouds. Check the settings when resuming a mission (for example after a battery change) to ensure that you did not accidentally change them.
A complete Tower Capture consists of the following components:
- Overview Orbit
- Tower Scan
- Antenna Scan
Overview Orbit
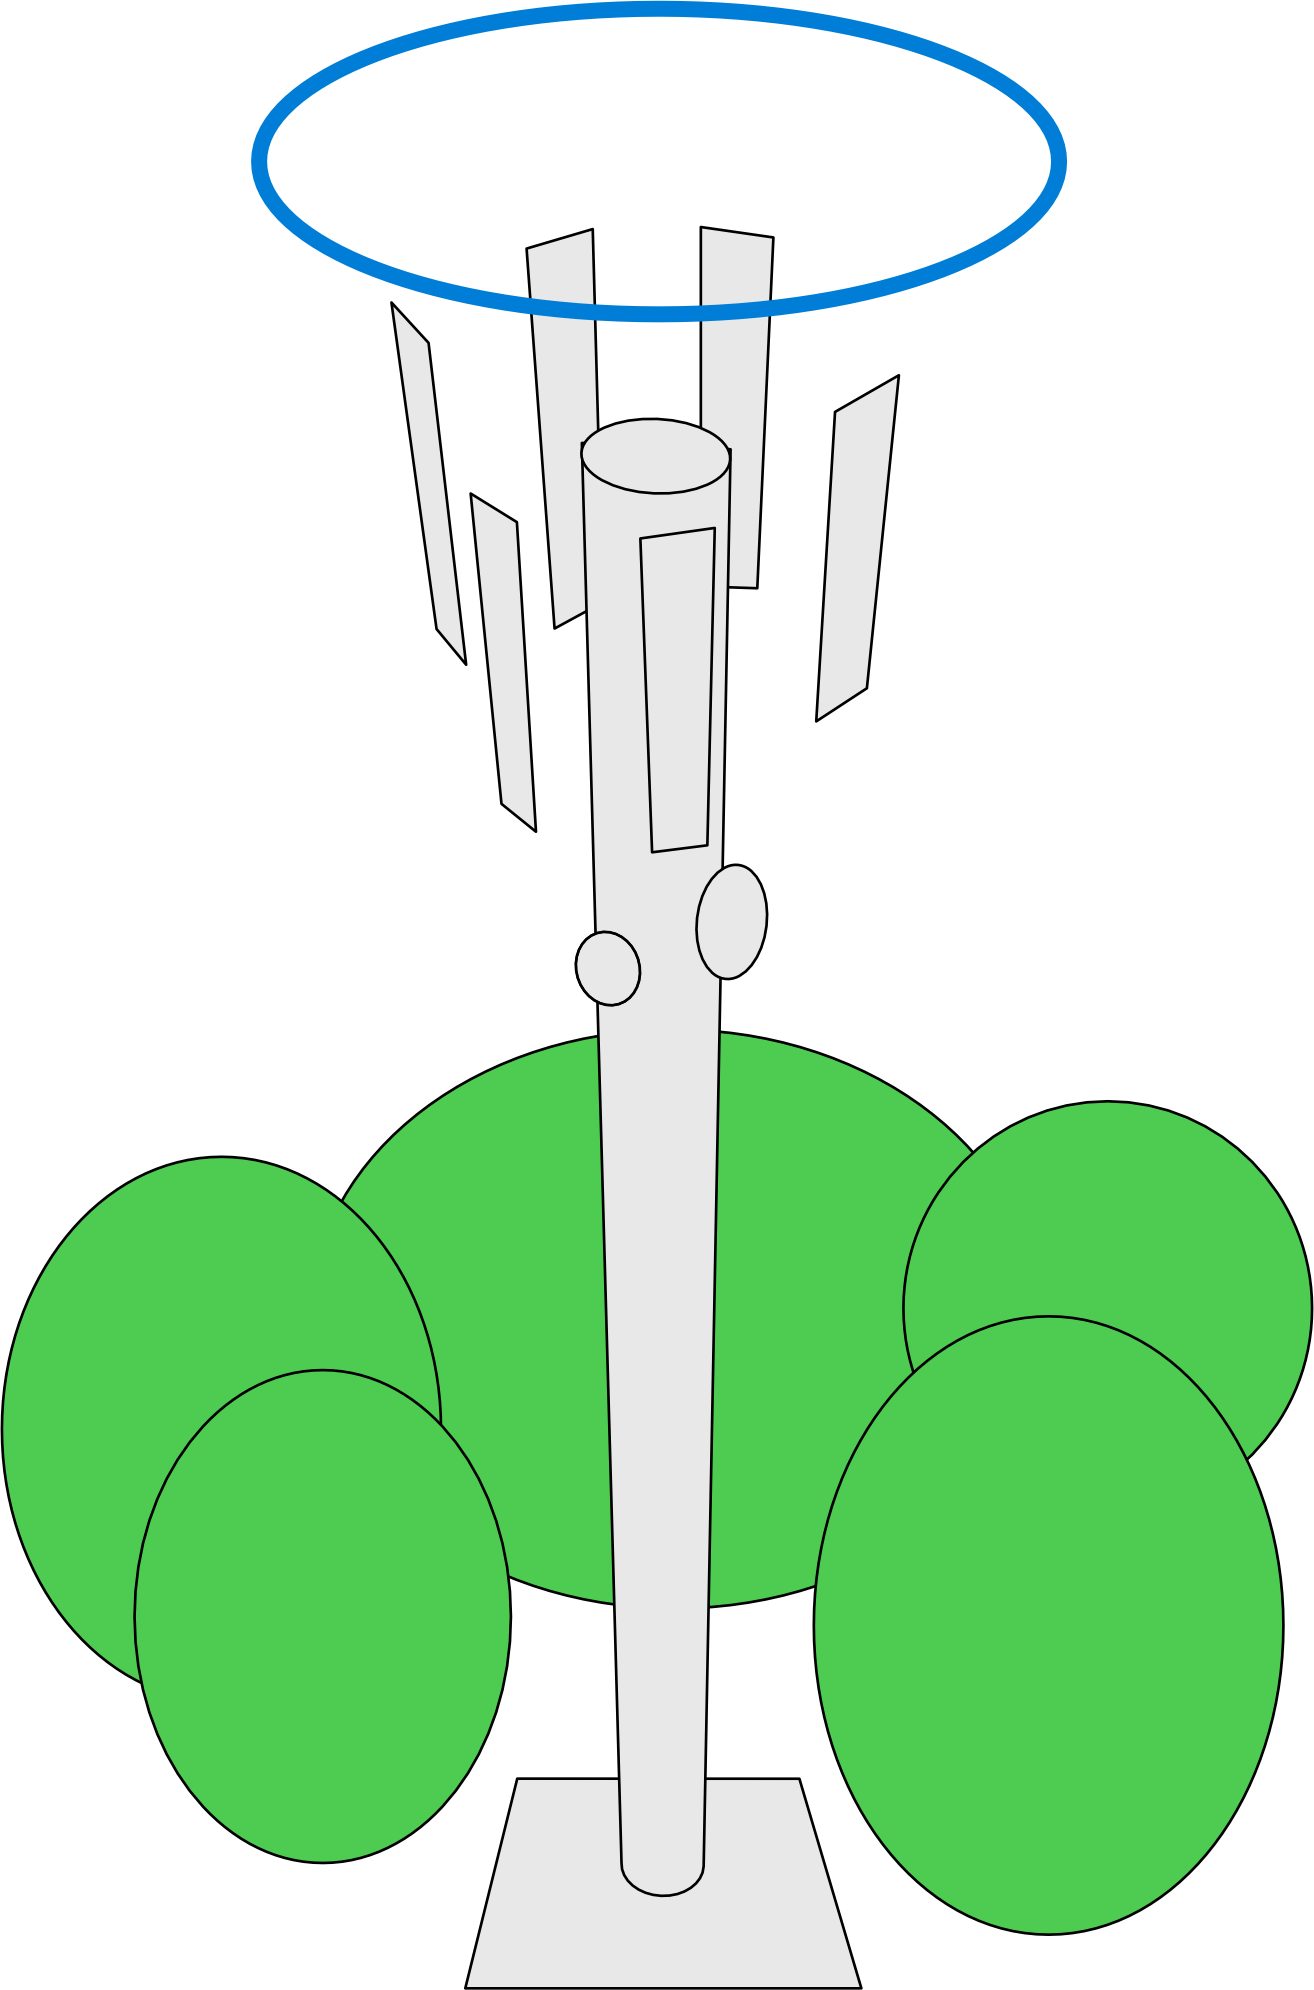
The purpose of this component is to capture the whole tower from base to top. It captures a single orbit above the tower:
Capture instructions:
- Use a camera gimbal angle of -65 degrees.
- Capture one orbit of about 50-70 images.
-
Frame the tower as shown in the image below. Make sure that neither the tower base nor its top are cut off. There also should not be too space above and beneath the tower.
- If using a drone equipped with an electronic shutter, keep the drone's velocity below 0.75 m/s (we found approximately 0.5 m/s to work well for most drones). Higher speeds can result in electronic shutter distortion and an inferior 3D model quality.
- Ensure the orbit is accurately centred around the tower.
Tower Scan
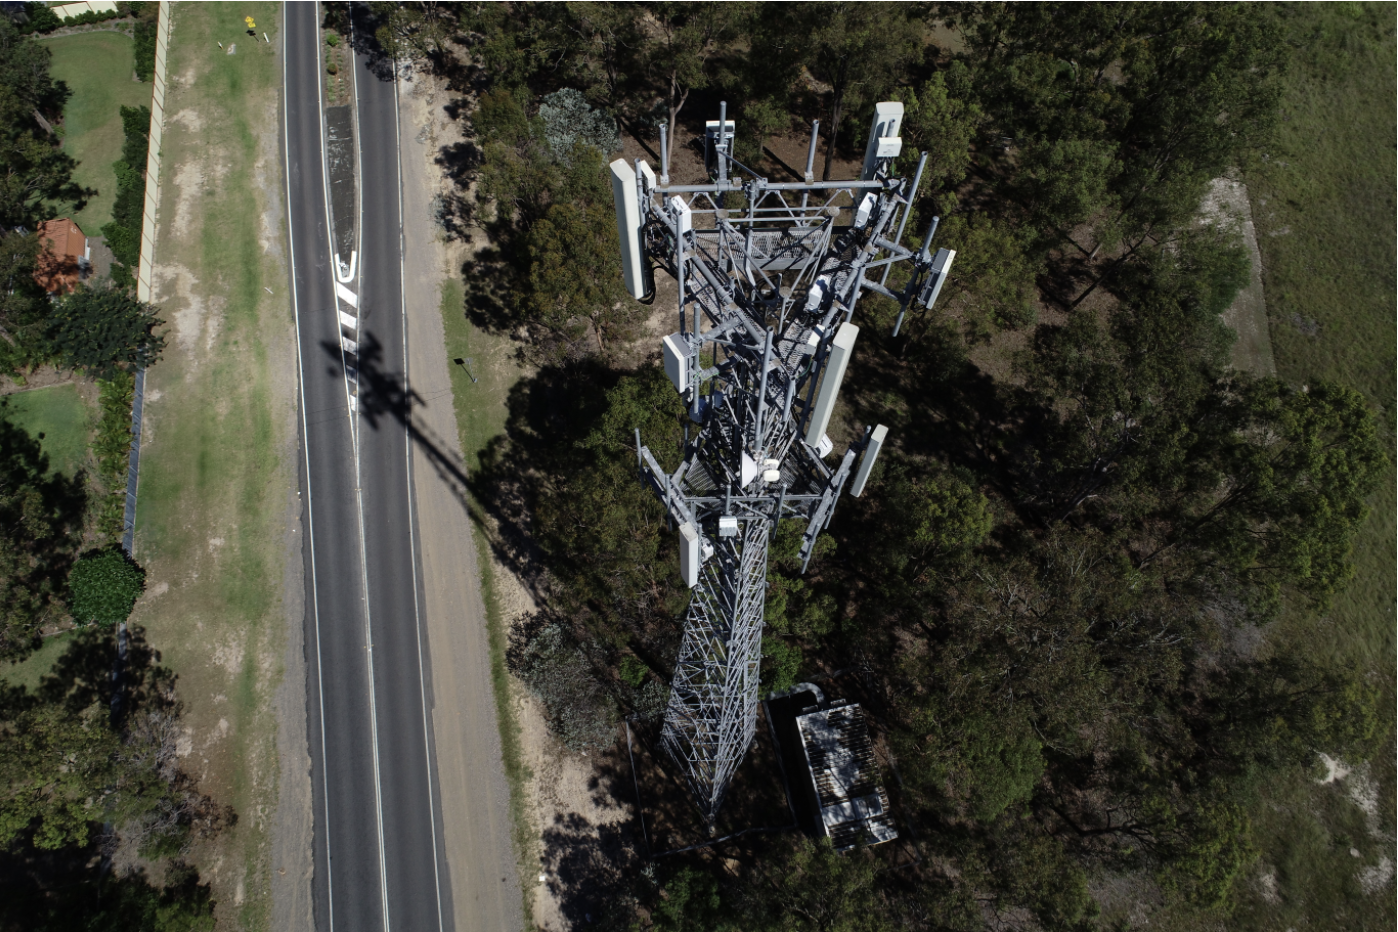
This component captures the whole tower using evenly spaced orbits. Where there are obstacles such as buildings or trees, it may be necessary to capture partial orbits or verticals:
Capture instructions:
- Use a camera gimbal angle of -45 degrees.
- Capture about 50 images per orbit.
- To determine the orbit radii, estimate the tower radius (i.e. the distance from the tower centre to the outside of the antenna furthest from the tower) and, depending on the focal length of your camera, add the correct Target Distance as shown in the table below. For example, if using a camera with a focal length of 24 mm to capture a tower with a radius of 2.5 m, the correct orbit radius would be 2.5+7=9.5 m.
Focal Length (35 mm Format Equivalent) Target Distance 22 mm 6.5 m 24 mm 7 m 28 mm 8 m 35 mm 10 m - Capture all orbits in the same direction as used for the Overview Orbit (i.e. do not mix clockwise and anticlockwise orbits).
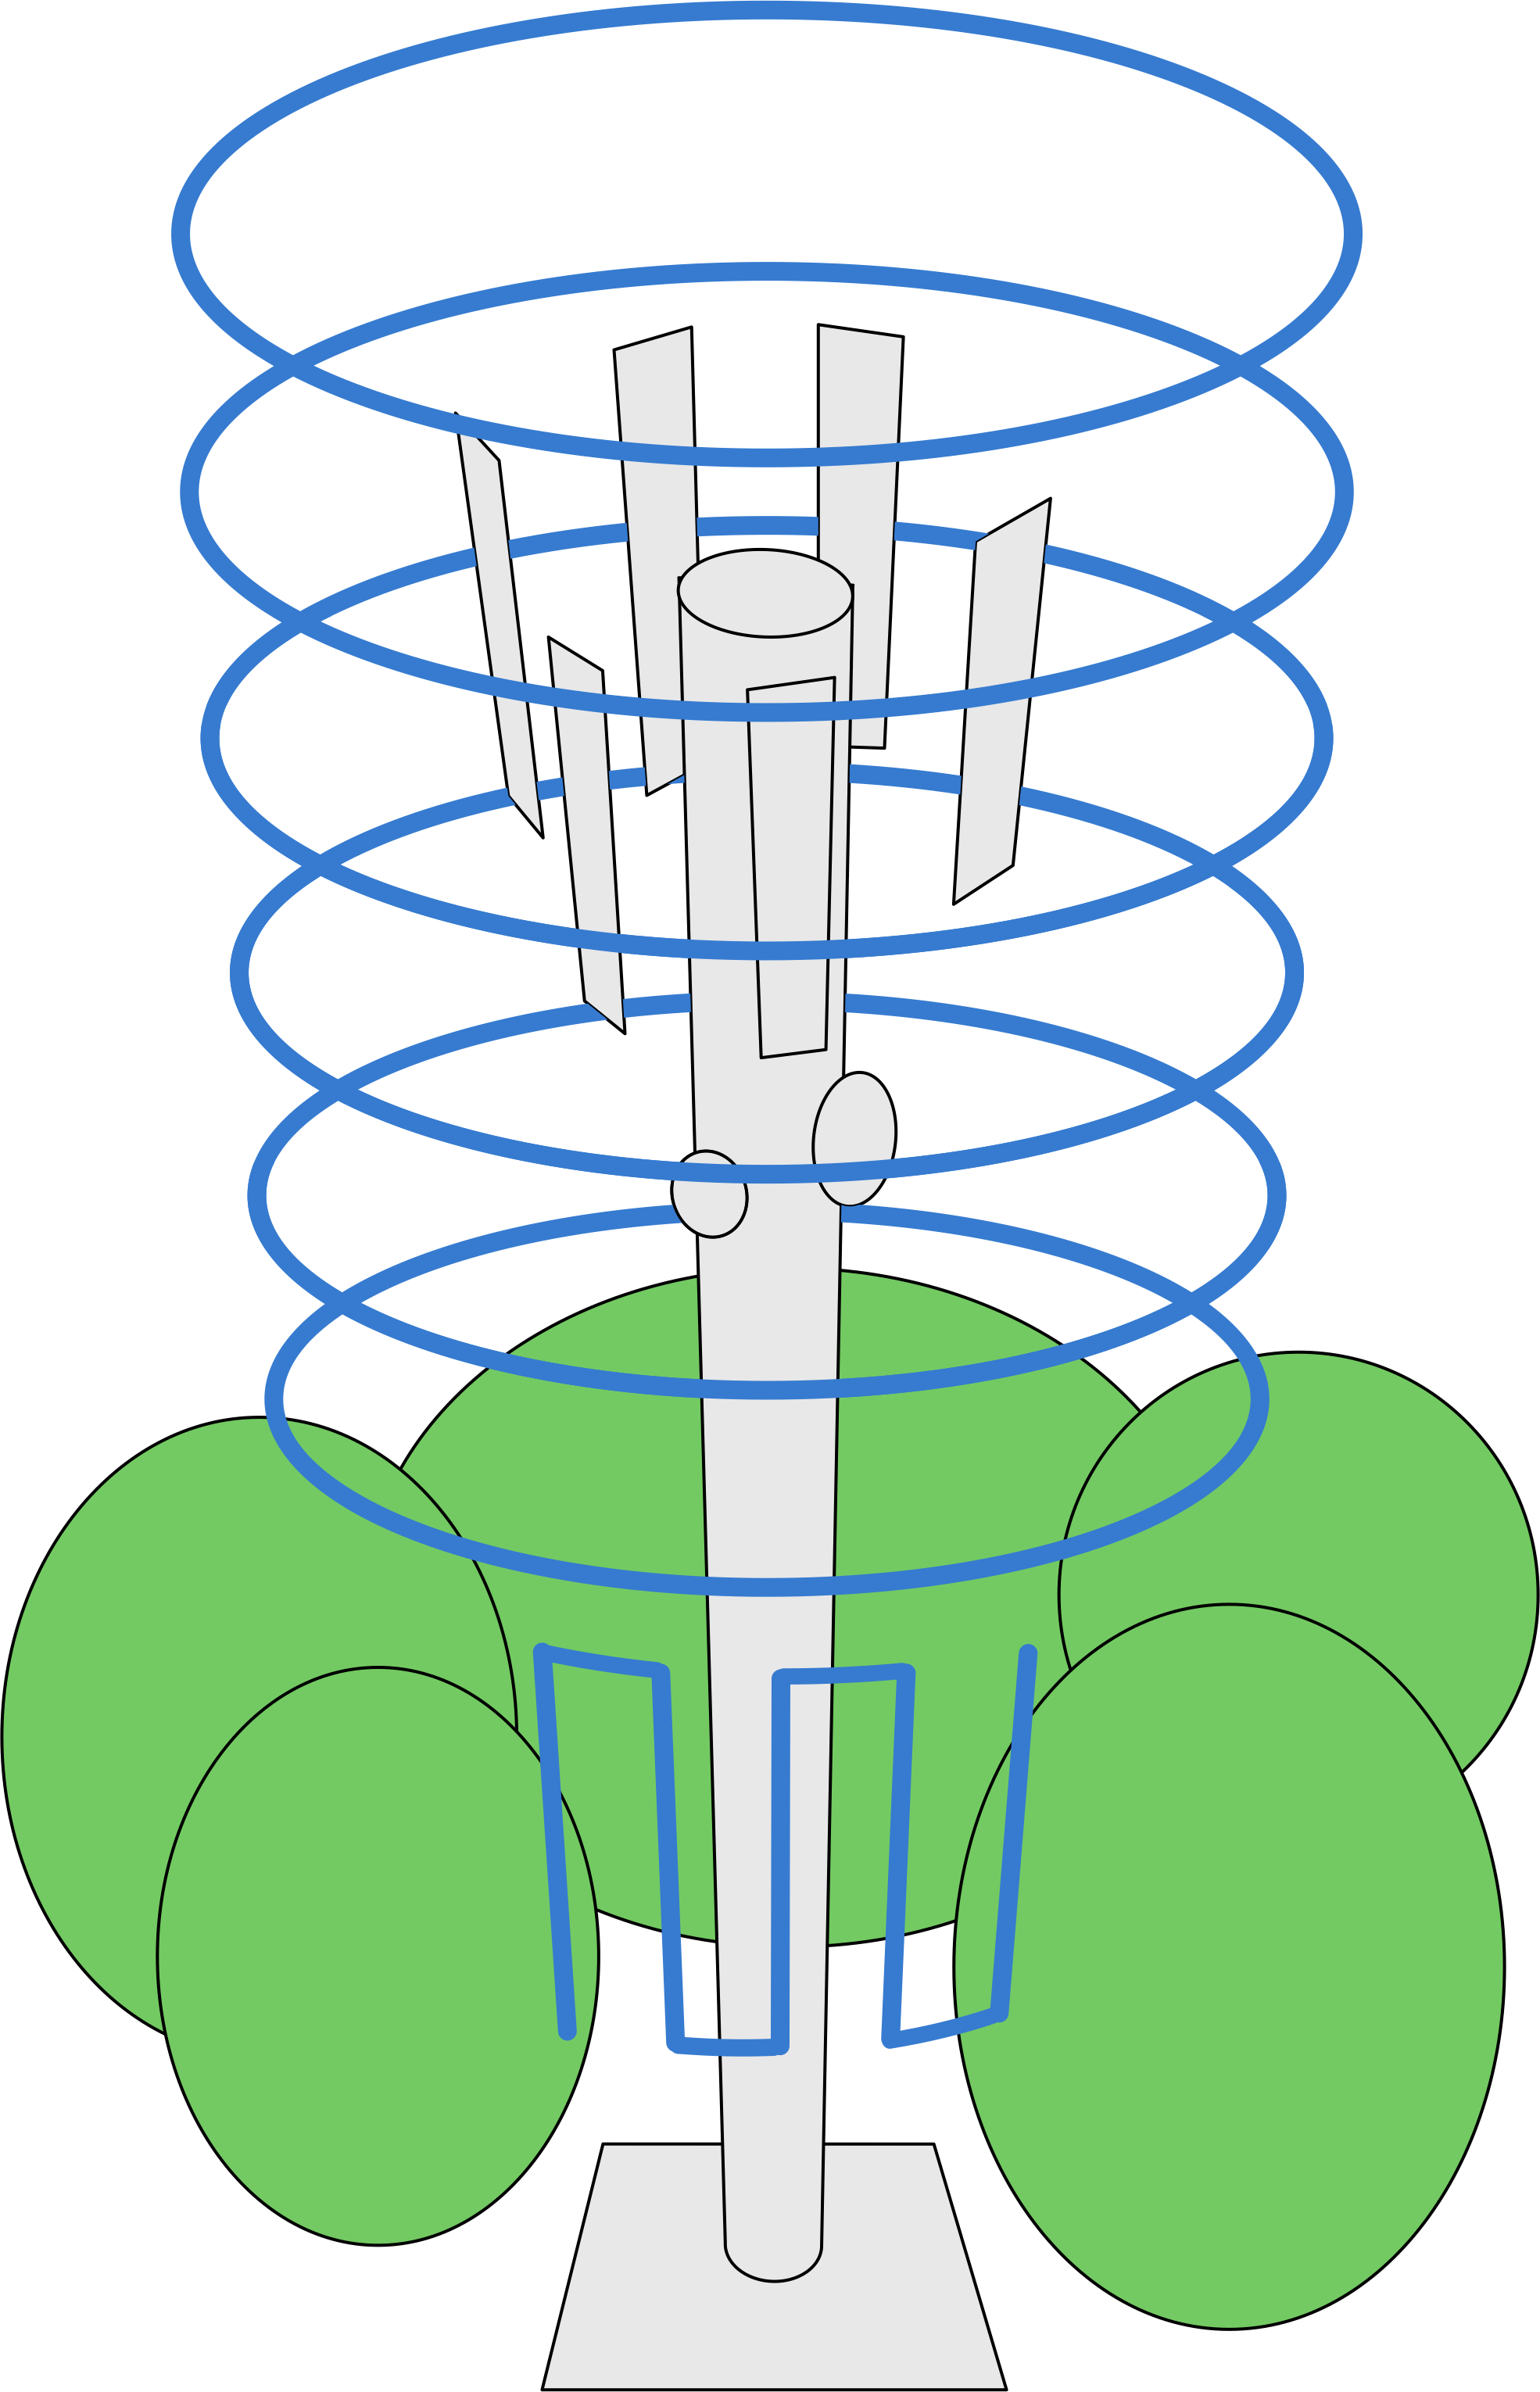
- Start with the top orbit. Calculate its altitude by adding the orbit radius to the tower height. For example, if the tower height is 35 m and the orbit radii are 9.5 m, the top orbit should be captured at an altitude of about 44.5 m. If you do this correctly, the tower top should be approximately in the centre of the image frame:
- Space all consecutive orbits 3 m apart vertically.
- The lowest orbit should fully capture the tower base:
- If using a drone equipped with an electronic shutter, keep the drone's velocity below 0.75 m/s (we found approximately 0.5 m/s to work well for most drones).
- Ensure all orbits are accurately centred around the tower.
If, due to obstacles, the last orbit is not low enough to fully capture the tower base, we recommend you capture additional images between the obstacles as follows:
- If the gaps between the obstacles are large: Capture partial orbits between the obstacles until the tower base is fully captured using the same specifications as for the full orbits. Also, remember to use the same flight direction (clockwise or anticlockwise) as you did for the full orbits.
- If the gaps between the obstacles are narrow: Depending on the size of the gaps, manually capture one to several verticals using the same target distance as for the orbits (see image above). Take an image every 2-3 m and stop the drone for each image. The horizontal distance between the verticals should be about 2 m. The bottom image in each vertical should fully capture the tower base.
Antenna Scan
This component captures each antenna array (an array is a set of antennas installed at the same height) using one orbit per array:
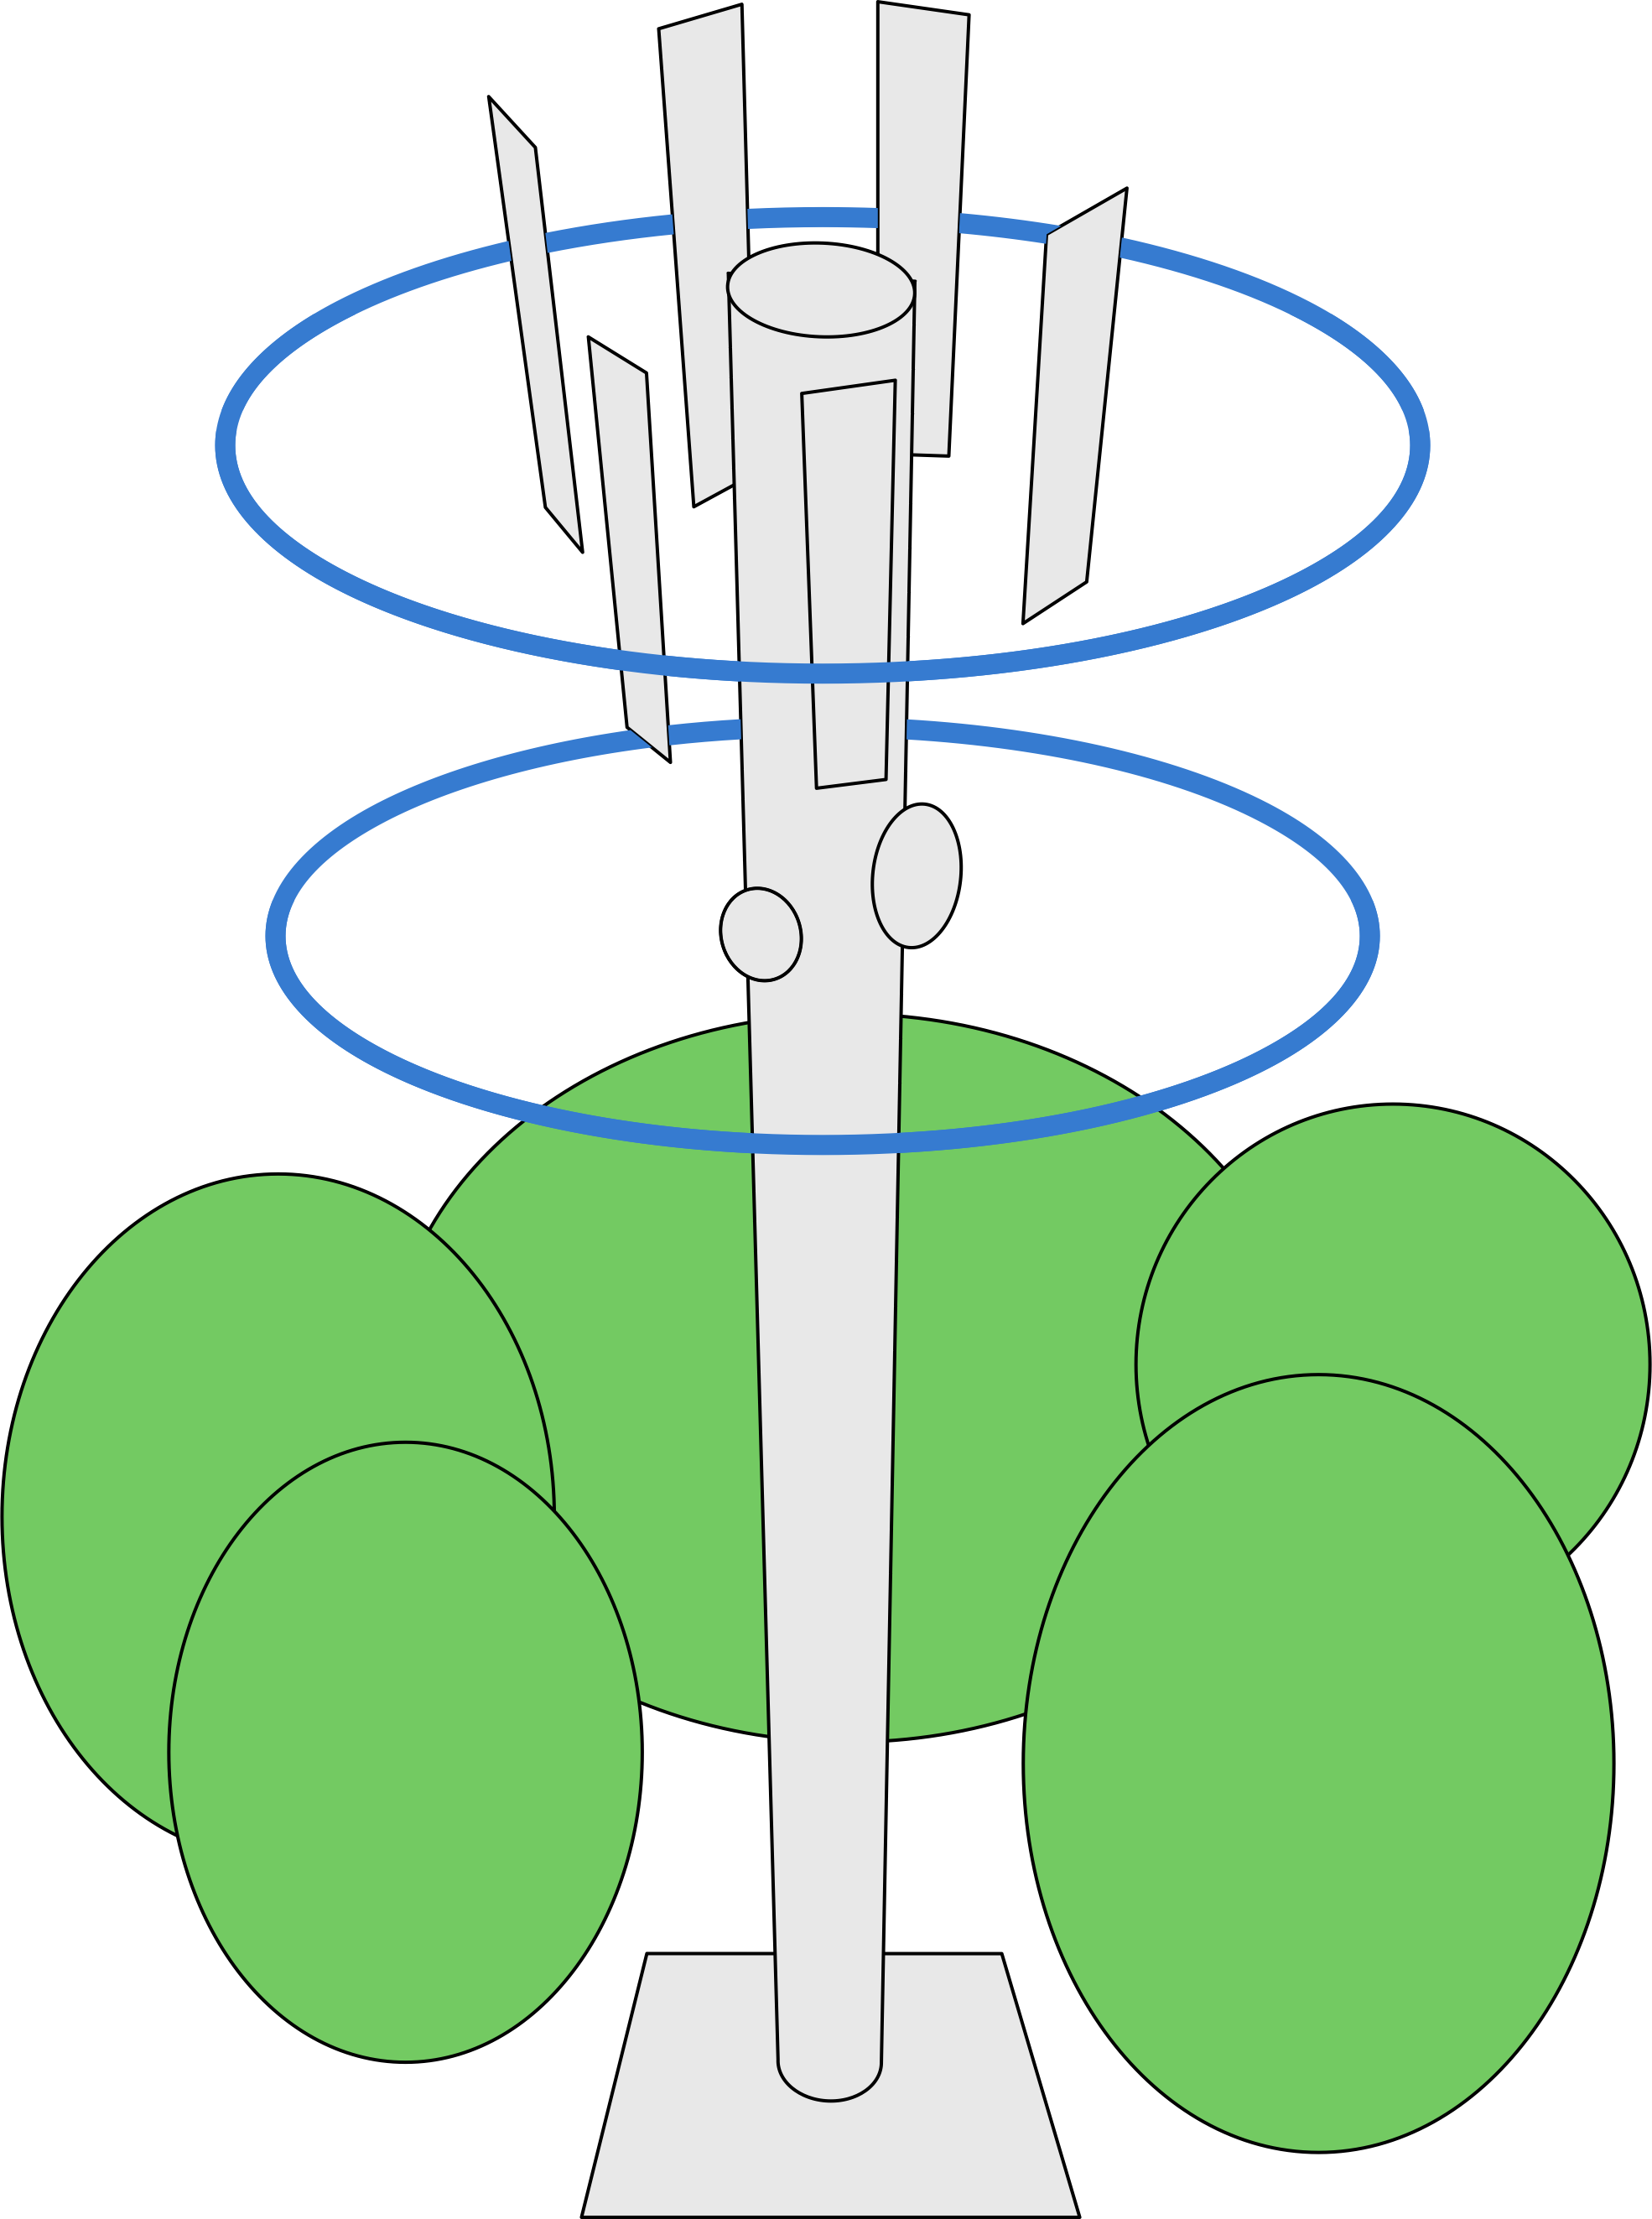
Capture instructions:
- Capture one orbit per array.
- Use a camera gimbal angle of -10 degrees.
- Capture about 50 images per orbit.
- Use the same orbit radius as for the Tower Scan.
- Capture all orbits in the same direction as used for the Overview Orbit and Tower Scan (i.e. do not mix clockwise and anticlockwise orbits).
- For each antenna array, adjust the capture altitude so that the bottom of the antenna panels or dishes is approximately in the centre of the image frame or slightly above it:

- If using a drone equipped with an electronic shutter, keep the drone's velocity below 0.75 m/s (we found approximately 0.5 m/s to work well for most drones).
- Ensure all orbits are accurately centred around the tower.
Optional Mission Components
Panorama
Use your preferred app's panorama feature to capture a 360-degree or spherical panorama approximately 20 m above the tower.
Adjust the exposure settings obtained using the histogram-based procedure (see above) by reducing the shutter speed by -1 EV (e.g. from 1/2000 second to 1/1000 second).
Orthomosaic
Use your preferred app's orthomosaic feature to capture a single grid (i.e. not a double-grid) approximately 20 m above the tower with the camera at nadir (-90 degrees). Use a frontal overlap of 80% and a lateral overlap of 70%.
Adjust the exposure settings obtained using the histogram-based procedure (see above) by reducing the shutter speed by -1 EV (e.g. from 1/2000 second to 1/1000 second).
Using Ground Control Points
Instead of the drone GPS data recorded with the photos during image acquisition, our processing software can use ground control points (GCPs) such as the one shown in the image below to improve accuracy of the 3D model significantly. Detailed information on the accuracy of the 3D models produced by SiteSee is provided in this document.
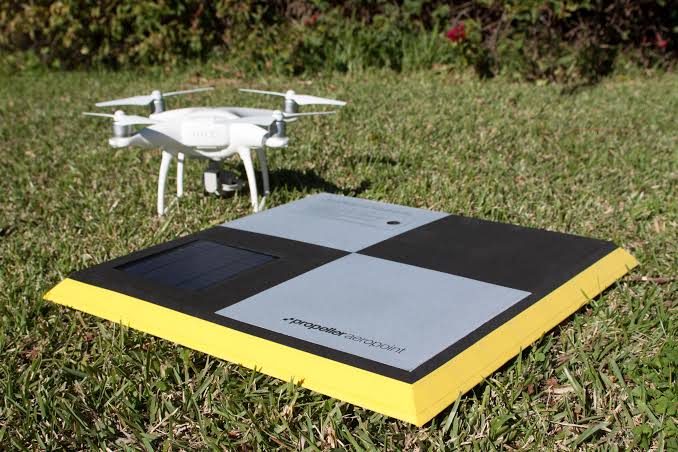
SiteSee requires its customers to use a specially designed system based on Propeller AeroPoints in conjunction with AprilTags which automates both the GCP position logging onsite and their subsequent processing, resulting in a significant reduction of processing time and cost. Please consult our Ground Control Points User Guide for details on how to use this system.